As mentioned in Part 1, the Network Interrogation Tool (NIT) is a web service written in Python/Flask that sits in the middle between SolarWinds and Rundeck to provide Rundeck with the various lists of options that the user must select for each job.

I’ll start with a very basic overview of Flask, but any web framework could be used for this layer. The primary goal is to get useful data out of your various tools and format them ready for Rundeck.
Flask is just one of many web frameworks that can be utilised in the Python programming language to build a web-based application. It is a micro framework, as opposed to something like Django which is a full-blown solution that contains all kinds of features already built-in. I would have probably used Django if I hadn’t discovered Rundeck, but as NIT was to be a relatively straightforward project, I decided to keep it simple with Flask.
The Flask quick start guide is a good resource if you want details, but for now it is enough to know that you can use the ‘route’ decorator to tell Flask what URLs should trigger your functions. If you are familiar with MVC, these would be analogous to controllers.
from flask import Flask
app = Flask(__name__)

@app.route('/subnets/list/', defaults={'output': 'html'})
@app.route('/subnets/list/')
def subnets_list(output):
# Subnet list code here.
Once the above application is loaded, a user navigating to ‘yourdomain.com/subnets/list’ would trigger the code contained within the subnets_list function. You can also see that we have defined an optional string variable named ‘output’. If nothing is appended to the URL, the string will default to ‘html’. You can capture a number of variables in this way, but in this case we are using it to switch between different outputs such as HTML or JSON.
When /json is appended to the URL, we then use Flask’s ‘jsonify()’ method to format Python lists as JSON and then return them to the browser. If the user doesn’t append anything then it will default to a HTML view. The HTML view is generated using Flask’s ‘render_template()’ method.
def subnets_list(output):
    # Object creation and error handling omitted.

    if output.lower() == 'json':
        # Convert list of Subnet objects into a list of tuples.
        json_subnets = []

        for subnet in subnets.list:
            json_subnets.append((str(subnet.netaddress), subnet.name))

        return jsonify(json_subnets)
    else:
        # Populate the title and description for the view.
        title = 'Subnets'
        description = 'This is a live list of subnets fed from NMS. ' \
                      'Append \'/json\' to the url for the Json endpoint.'

        # Populate the table's headers.
        table_headers = ['Subnet', 'Name']

        # Populate a list of tuples with data.
        table_data = []

        for subnet in subnets.list:
            table_data.append((subnet.netaddress, subnet.name))

        return render_template('table.html',
                               title=title,
                               description=description,
                               table_headers=table_headers,
                               table_data=table_data)
The ‘render_template()’ method takes a template file as a parameter. This template file needs to be written in HTML along with the templating engine Jinja2. The example code snippet below shows a table header being generated from a passed list named ‘table_headers’. By passing our page title, description, table headers and table data into the template, we can dynamically generate pages while using a single template file.
<thead>
    <tr>
        {% for header in table_headers %}
            <th>{{ header }}</th>
        {% endfor %}
    </tr>
</thead>
The HTML/CSS itself utilises the popular CSS library Bootstrap. With Bootstrap you can easily create responsive pages with navigation bars, image carousels etc.
While developing your application locally, Flask will start a basic web server on your PC for testing. This test server shouldn’t be used in production and you will need to integrate your application with a proper web server, such as Apache. To integrate Apache with your Flask application, a Web Server Gateway Interface (WSGI) file is used. The WSGI file (shown below), tells Apache how to start your application.
import sys
sys.path.insert(0, '/opt/scripts/nit')

from nit import app as application
You can then reference the .wsgi file from your httpd.conf file. You will also need to install mod_wsgi and restart Apache.
   ServerName nit.yourdomain.com
   WSGIScriptAlias / /opt/scripts/nit/apache/nit.wsgi
   WSGIDaemonProcess nit.yourdomain.com user=scripts group=scripts processes=2 threads=25
   WSGIProcessGroup nit.yourdomain.com


      Require all granted
Now that we have covered the web front-end of NIT, that front-end needs some data to display. This data is fetched from SolarWinds and manipulated by a set of wrapper classes and their methods. Below is the code that we might use within our previously shown ‘subnets_list’ function to instantiate an object from our ‘Subnets’ class.
# Instantiate a SolarWinds API instance using the
# details from the application config file.
sw_api = solarwinds.Api(app.config['SW_APIURL'], app.config['SW_USERNAME'], app.config['SW_PASSWORD'])

# Pass the above API to the constructor of Subnets.
subnets = nms.Subnets(sw_api)
The ‘Subnets’ class (shown below) takes an instance of the SolarWinds API in its constructor. This API is then used within a list property to fetch all subnets from our IP Address Management (IPAM) system using SQL-like statements that the SolarWinds API expects.
It then iterates through the results, instantiates a new Subnet (singular) object for each record and then adds those new objects to a Python list. Finally it returns the list of ‘Subnet’ objects to the calling function.
class Subnets(object):
    '''Subnets class.
    Attributes:
        sw_api: A SolarWinds API instance.
    '''
    def __init__(self, sw_api=None):
        if sw_api is None:
            raise errors.Error('[%s.%s] - You must provide a SolarWinds API instance.' % (__name__, self.__class__.__name__))
        else:
            self.sw_api = sw_api

    @property
    def list(self):
        '''Get a list of subnets and their details from SolarWinds.
        Returns:
            A list of subnet objects.
        '''
        sw_subnets = self.sw_api.query('SELECT DISTINCT Address, CIDR, FriendlyName FROM IPAM.Subnet ';
                                       'WHERE Address IS NOT NULL AND AddressMask IS NOT NULL')

        subnets_list = []

        for sw_subnet in sw_subnets['results']:
            if '0.0.0.0' not in str(sw_subnet['Address']):
                new_subnet = Subnet(str(sw_subnet['Address']) + '/' + str(sw_subnet['CIDR']), sw_subnet['FriendlyName'])
                subnets_list.append(new_subnet)

        return subnets_list

class Subnet(object):
    '''Subnet class.
    Attributes:
        netaddress: The network address in IP/CIDR format.
        name: The subnet's name, if available.
    '''
    def __init__(self, netaddress=None, name=''):

        if netaddress is None:
            raise errors.Error('[%s.%s] - You must provide a network address for the subnet in CIDR format.';
                               % (__name__, self.__class__.__name__))
        else:
            self.netaddress = IPNetwork(netaddress)
            self.name = name
The ‘list’ property of the class is subsequently used within our decorated Flask functions to output the subnets as JSON that Rundeck can utilise.
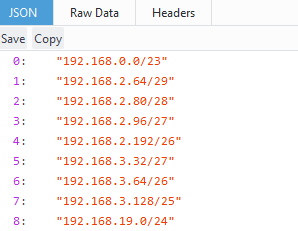
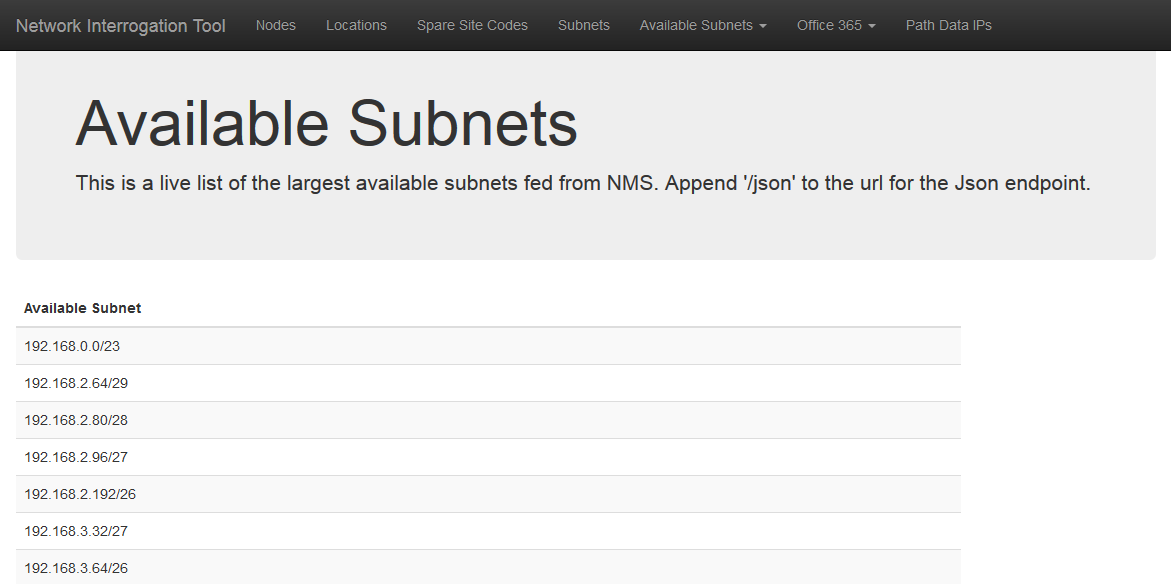
Another property of the Subnets class is ‘available’, which utilises the netaddr library to return a list of the largest available subnets that can still be utilised. This is the HTML template view without the ‘/json’ appended to the URL.
Similarly, the class method ‘available_bysize()’ takes a CIDR value (24, 25 etc) and returns a list of available subnets that match the given size.
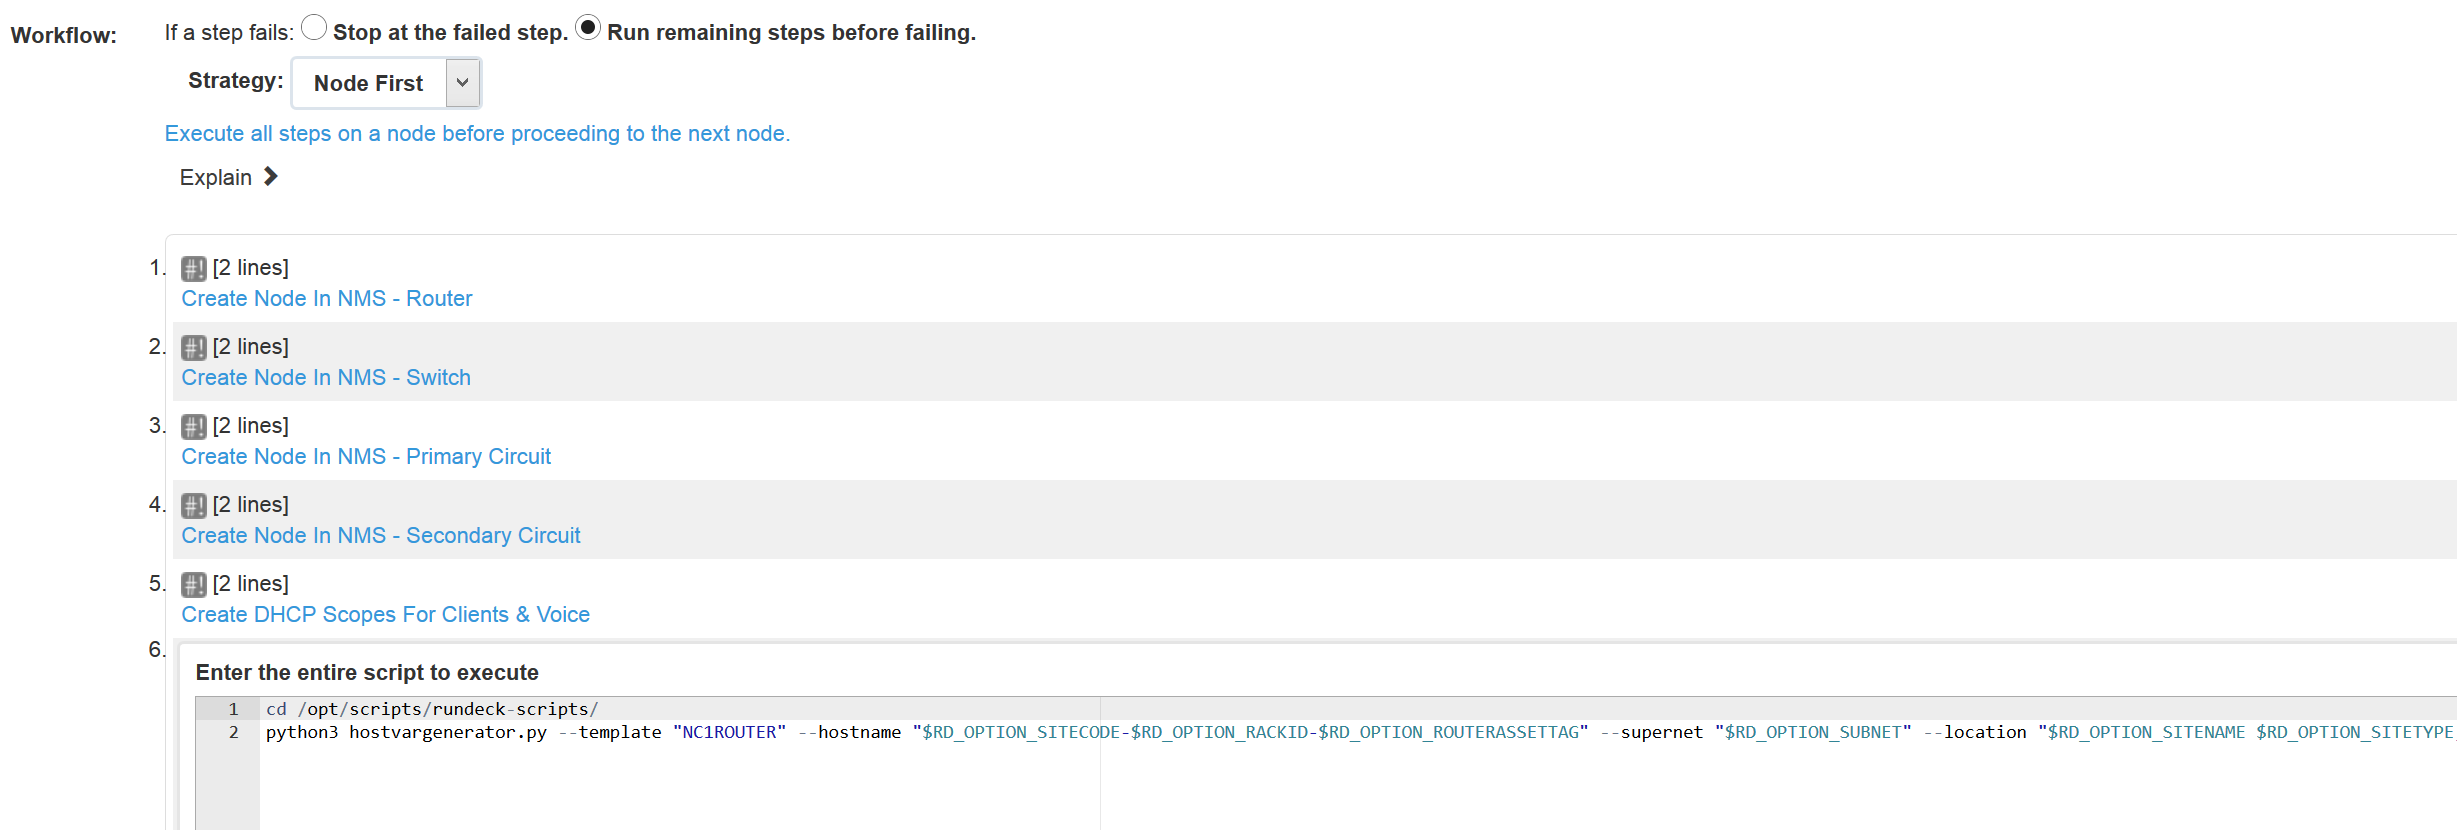
Your requirements and data repositories may be different, but hopefully this has served as an overview of how you might get data out of your own tools and formatted as JSON endpoints. Once all of your required endpoints are available and are displaying the correct data, you can now use those URLs in Rundeck to provide choices to your users when they are preparing automation jobs.

The user is now forced to select a valid subnet that we can be confident is available.

In Part 3 we will discuss what happens when a user executes a job from within Rundeck.